Share this article! Here's a short link you can use: http://im.vu/help1033
Whether you’re just taking snapshots of the app, or sending a screenshot to our Customer Service team for support, here are some ways how you do screenshots on your device:
On IMVU Mobile (iOS)
STEP 1. Go to the screen you want to capture.
STEP 2. You can capture a screenshot by simultaneously pressing the Top power button on the side of your iPhone together with the Volume up button.

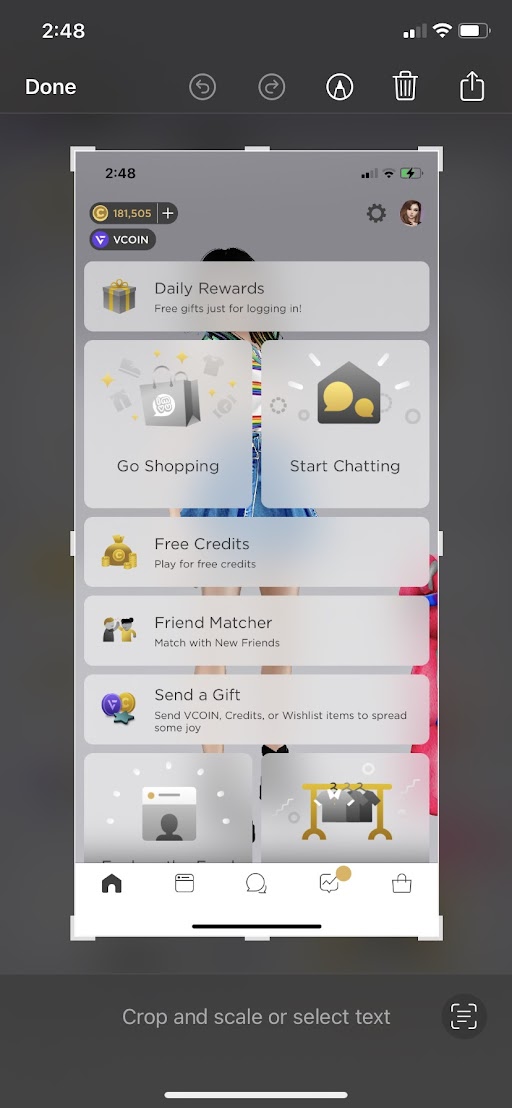
STEP 3. A thumbnail image of your screen capture will appear in the bottom left-hand corner of your iPhone screen. It will show you an edit option by simply tapping on the thumbnail. You can easily crop out areas you only want to show.


STEP 4. Click “Done” then check the screenshot on your device “Photos”.
For iPad: Simply press the Top and Volume up button together at the same time and quickly release to capture an image of your current screen. If your iPad has a Home button press the Top button and the Home button together and quickly release.
On IMVU Mobile (Android)
STEP 1. Go to the screen you want to capture.
STEP 2. Press the Power and Volume down button at the same time. It will also depend on the phone you are using, if it doesn’t work you can try to press and hold the power button for a few seconds then select “Screenshot”.

Note: If neither of these work, go to your phone manufacturer’s support site for help.
STEP 3. At the bottom left, you’ll find a preview of your screenshot. On some phones, at the top of the screen, you'll find Screenshot capture. By clicking the thumbnail image of your screenshot a new screen will appear showing the edit option to easily crop out areas you only want to show.


STEP 4. Click “Save or Done” then check the screenshot on your device’s “Gallery or Photos”.
For Android Tablet: Press and Hold the Power and Volume down keys at the same time and quickly release to capture an image of your current screen. If your Tablet has a Home button, press the Home button and Volume down keys together.
On IMVU Desktop (Mac OS)
STEP 1. Show the screen you want to capture.
STEP 2. Press and hold these three keys together: Shift, Command, and 3 to capture the whole screen. To capture only a portion of the screen, press and hold the keys Shift, Command, and 4.
 or
or 
Note: Drag the crosshair  to select the area of the screen to capture. To move the selection, press and hold space bar while dragging. To cancel taking the screenshot, press the Esc (Escape) key.
STEP 3. Save your Screenshot you capture on your Device file. Make sure to save it where you can easily find the image.
On IMVU Desktop or IMVU Classic (IMVU Client)(Windows)
STEP 1. Go to the screen that you want to screenshot.
STEP 2. Find the "Print Screen" key on your keyboard. The Print Screen key will usually be abbreviated to "PrtSc" or something similar.

STEP 3. Press and hold the ⊞ Windows key and the Print Screen (PrtSc) key.

STEP 4. Save your screenshot on Computer’s file. Make sure to name the file and place it in the folder where you can easily find it.

Other Option:
You can also take a screenshot using the Snipping Tool on your computer. Here are the steps you need to follow:
STEP 1. Go to the Screen you want to capture.
STEP 2. Select the Start or Windows Logo on your keyboard, type “snipping tool” under search, then select Snipping Tool from the results.
STEP 3. With your Snipping Tool open, select “New” and the screen will gray out. Click and hold the + sign and drag the portion of the screen you want to capture.

STEP 4. After you capture a snip, select the Save Snip button.

STEP 5. In the Save As box, type the file name and select Save. Make sure to name the file and place it in a folder where you can easily find it.
Was this article helpful?
That’s Great!
Thank you for your feedback
Sorry! We couldn't be helpful
Thank you for your feedback
Feedback sent
We appreciate your effort and will try to fix the article